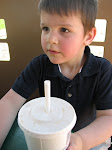
My kids LOVE jam!!! We've been out of strawberry jam for quite some time. I decided TODAY was the day to whip up a new batch. Samuel was my helper in the kitchen. He did so good helping me stir the pot WITHOUT STOPPING!!!! It made it so much easier for me to get everything ready. He had fun and loved counting up to 60 when the jam started boiling for the second time.

He wanted me to take a close-up picture of the pot that he was stirring. :)

The finished product, still warm, on a slice of homemade bread....yummy!!


~Easy Strawberry Jam~
*for Carrie*
This is how we made the jam today....
Put 5 cups of thawed strawberries along with the juice in the blender. Turn blender on for just a few seconds to get the lumps out. Put the blended berries in a LARGE stockpot. Add to the berries one box of Sure-Jel and 1/2 tsp. of butter. In a SEPARATE bowl measure 7 cups of sugar and set aside. Over high heat, heat the berries to a rolling boil while stirring CONSTANTLY!!! (A rolling boil is where the berries keep boiling while you are still stirring.) Quickly pour in ALL the sugar while you still stir. Keep stirring until the mixture comes to a rolling boil again. Remove from the heat and pour into prepared jars(see below). Be VERY careful.....the jam is VERY hot!! I have a funnel that I put in the jars that makes it easier to ladle the jam into the jars without burning myself. ;) Wipe the rims of the jars with a clean wet cloth, add seals and rings. Turn jar upside-down for an hour or so. Turn right side up and allow to completely cool. This makes 2 quart-sized jars. You may also use pint-sized or jelly-sized jars but we go through those far too fast!!! :)
HOW TO PREPARE JARS/LIDS/RINGS
Wash jars in hot, soapy water. After you rinse them, pour hot water inside and allow them to sit inside a pan of clean, hot water. Place the lids/rings in hot water as well.
*we also make this same recipe with fresh strawberries when they are in season* If you buy fresh berries from the store or pick your own, just mash up enough berries until you have 5 cups of berries/juice and then follow the rest of the recipe. These berries were fresh-picked berries that we had in the freezer leftover from the last time we picked them. Tip....pick lots of berries and freeze them....they make just as good jam months later as making it up the day you pick them. :) Also, if you can find a local strawberry farm that allows you to pick your own, it's a whole lot cheaper than buying them already picked.